Hi Everyone i am Yogesh Soni. I hope you guys are doing well. So you are curious to create your own cryptocurrency in 2026 thats why you are here on my blog post.
I will guide you step by step from creating your first ever crypto currency and listing it and adding liquidity so anyone can trade it and i am 100% sure that you will like this guidance and create your crypto within 30 minutes.
So first of all what you need to get started –
- Proper mindset ( Dedication and trust to the process)
- A laptop or a Desktop Computer
- Good Internet connection.
- A crypto wallet – ( I prefer Metamask )
- A lil fund to pay gas fee approx 0.01 BNB
Step 1 – Installing necessary addons and extension to your Browser
I prefer Chrome for all the process.
first search metamask addon on chrome and install it. You can directly install in from this link and click add to chrome.
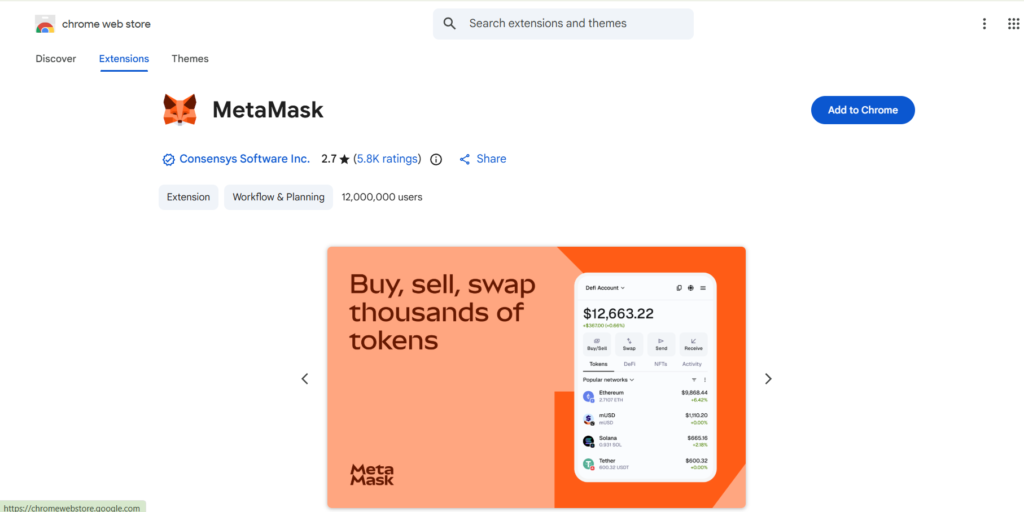
after clicking on add to chrome it will be installed on your browser. just configure it and create your wallet and fund it will either real BNB or some test BNB, so you can do the whole process on testnet with no real money.
Step 2 – Switch to Binance smart chain on Metamask
We will create a BEP20 token on Binance smart chain, so it is necessary to switch to Binance smart chain.
You can also add Biance testnet RPC if you want to create token on testnet for testing purpose.
step 3 – Open remix ide on chrome
Just copy and paste this url in your chrome browser – https://remix.ethereum.org
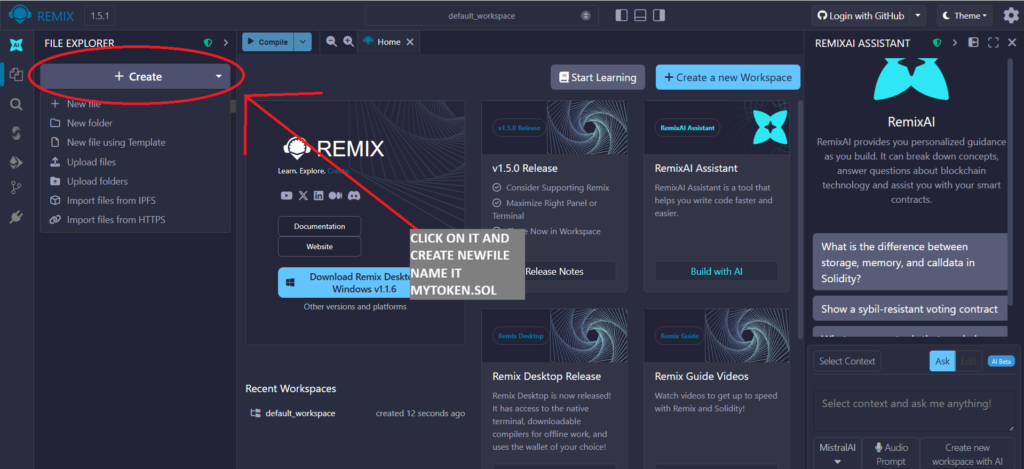
Step 4 – Open Mytoken.sol and paste the smart contract i shared below
// Current Version of solidity
pragma solidity ^0.8.4;

// Main coin information
contract Token {
    // Initialize addresses mapping
    mapping(address => uint) public balances;
    // Total supply (in this case 1000 tokens)
    uint public totalSupply = 1000 * 10 ** 18;
    // Tokens Name
    string public name = "My Token";
    // Tokens Symbol
    string public symbol = "MTK";
    // Total Decimals (max 18)
    uint public decimals = 18;

    // Transfers
    event Transfer(address indexed from, address indexed to, uint value);

    // Event executed only ones uppon deploying the contract
    constructor() {
        // Give all created tokens to adress that deployed the contract
        balances[msg.sender] = totalSupply;
    }

    // Check balances
    function balanceOf(address owner) public view returns(uint) {
        return balances[owner];
    }

    // Transfering coins function
    function transfer(address to, uint value) public returns(bool) {
        require(balanceOf(msg.sender) >= value, 'Insufficient balance');
        balances[to] += value;
        balances[msg.sender] -= value;
        emit Transfer(msg.sender, to, value);
        return true;
    }

}
You can change the Total Supply , Token name , Token Decimals , Token Symbol as per your requirement.
after pasting the code in mytoken.sol and somply go to next step
Step 3 – Click on the compile Icon and Compile the smart contract so their will be no errors

make sure you will not get any error here, see the green check mark on compile icon for successful compilation.
Step 4 – Now Go to Deployment tab which is just below the compile icon

Here now make sure you are connected to your metamask wallet, if you are not – just click on environment dropdown above and select injected provider – metamask.
it will automatically connect your account to metamask.
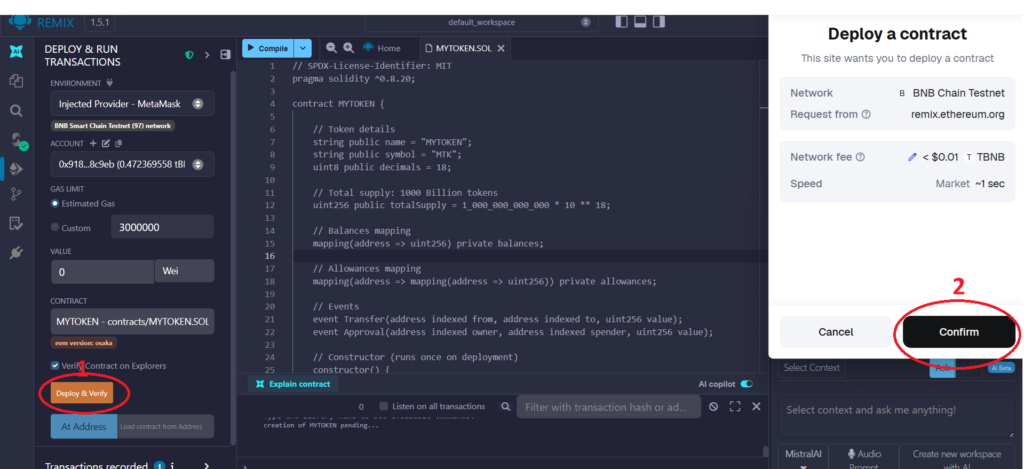
Step 5 – Click on Deploy & Verify
Here you have to click on Deploy & Verify it will sent a transaction request on your metamask wallet , simply confirm it. It will charge you a deployment fee approx 0.01 BNB .
And Tan Tanaaa your first ever Cryptocurrency is ready to Boom in market.
Make sure you share this article across your friends circle and other who really want to create a crypto currency without any coding knowledge.


